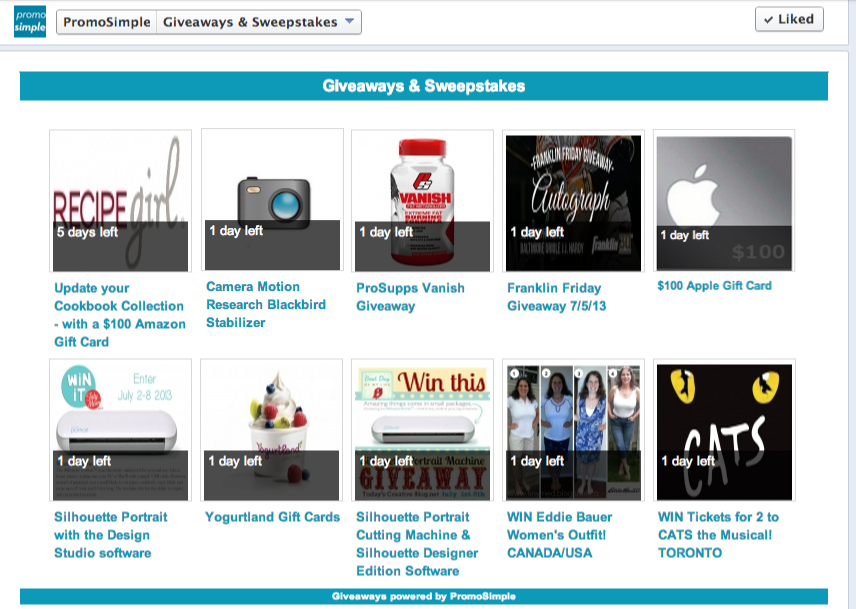
You can now create and add Custom Widgets to your Facebook Pages. This widget is automatically updated via a feed from your PromoSimple account to always contain your live giveaways and sweepstakes. You can also opt to include listings from the Giveaways Network to provide your Facebook Page visitors with additional content.

To create a new Facebook widget go to the Promote section when logged into your PromoSimple account and click on the Facebook Widget tab.
Customize your Facebook Widget
You can alter the fonts and colors used in your widget by clicking on the Customize Widget Colors & Fonts link. This allow you to enter a HEX value or click on the square color picker icon to use the interactive color picker. You can opt to display (or hide) the number of days that are left and the number of entries to-date for each listing that is shown within your widget. For additional content you can opt to display campaigns from the Giveaways Network, which will ensure that there are always a minimum of ten listings available in your widget.
Authorize the Facebook App
To add your widget to your Facebook page click on the Login w/Facebook (if you are not currently logged in) or Authorize this App button on the right side of the page. Once you are logged in you will need to Authorize the App, including giving it permission to ‘Manage your pages’. This authorization is required for PromoSimple to communicate with Facebook and add the content to your page.
Add widgets to Facebook Pages
Once you have approved the App a list will show that contains all of the Facebook Pages that you are an administrator for. Click on each page that you would like to add the widget to and then click on ‘Add’. Those pages should then appear in the right section under ‘Published’. You can remove tabs at any time by clicking on those pages and then clicking ‘Remove’.
Widgets on Facebook
Once you’ve added the widget to your Facebook page you can visit your page and will see a tab labeled ‘Giveaways and Sweepstakes’. The content of this tab will be your widget. You can change the name and image of the tab by clicking on the downward pointing arrow to the right and then hovering over the tab. When hovering you should see a small edit icon in the top right. Click on this icon to open the edit dialog which allows you to rename the tab and upload your own image.


7 Comments
https://snaptik.pw/
Hello there, just became aware of your blog through Google, and found
that it is truly informative. I'm gonna watch out for brussels.
I'll appreciate if you continue this in future.
Many people will be benefited from your writing. Cheers!
cviky na boky a pas
If you wish for to obtain much from this post then you have
to apply these methods to your won weblog.
ثبت شرکت در ایران
This paragraph will help the internet visitors for setting up new weblog or even a blog from start to end.
ARTIFICIAL INTELLIGENCE
I am not sure where you're getting your info, but great topic.
I needs to spend some time learning more or understanding
more. Thanks for great info I was looking for
this information for my mission.
explicitness
Thanks for a marvelous posting! I quite enjoyed reading it,
you may be a great author.I will remember to bookmark your blog and will eventually come back later on.
I want to encourage yourself to continue your great writing, have
a nice weekend!
123moviestv.ru
You should be a part of a contest for one of the best blogs on the internet.
I'm going to highly recommend this blog!
https://tubemp4.ru
I blog frequently and I truly thank you for
your information. The article has truly peaked my interest.
I will book mark your website and keep checking for new
information about once a week. I subscribed to your
Feed too.