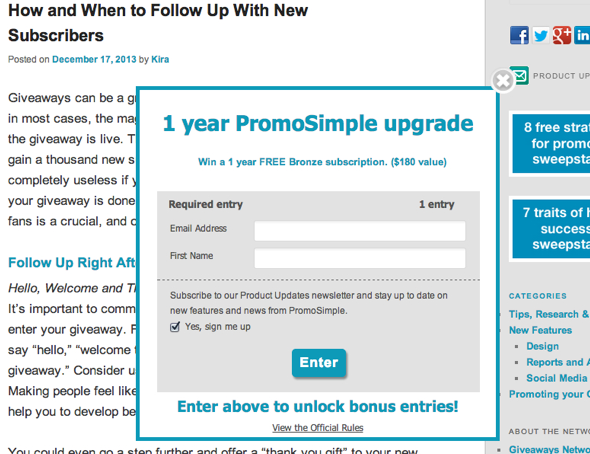
We’ve launched the PromoBar (formerly the Website Layer) with all sorts of new features and design options. Now, by adding a snippet of code to your website or blog you can allow the PromoBar to display on all or some of your pages to entice your visitors to enter your promotions.

What is the PromoBar?
The PromoBar can be added to any website or blog and allows you to add a layer at the top, right or left edge of your webpages to feature your current promotions. Once the code has been added to a website you can make all of your adjustments directly within your PromoSimple account so that you never need to touch your website code again.
When users click on your PromoBar your entry form will be displayed on top of the webpage’s content so that the user can enter the promotion without navigating to a new page or website.
Why use the PromoBar?
The PromoBar offers automated features, such as immediately displaying your most recently launched giveaway or always showing the giveaway from your account that is ending the soonest to ensure that you don’t need to take any action when publishing new giveaways. This also gives you the opportunity to promote your giveaways across your entire website or only on specific pages without taking up real estate on the actual page.
When you enable the automated versions of the PromoBar, such as always showing your most recently launched giveaway, as soon as you click ‘Publish’ for a new giveaway your visitors will see that giveaway on your website and can immediately begin entering. There is no additional work for you.
If you have no current giveaways running the PromoBar will simply not appear to visitors on the site. When you later launch a new giveaway the PromoBar will begin appearing again.
Designing the PromoBar
All aspects of the PromoBar can be designed to fit in with your website’s design and branding. This includes fonts and colors, choose from default options or add your own colors to make the PromoBar match your website’s branding. You can also choose whether to include a customizable call-to-action button.

Assigning content to the PromoBar
You have the option of choosing whether to automate the content displayed in the PromoBar. You can choose to always display your most recently published giveaway or show the giveaway that is ending soonest. These settings will use the text from your campaign’s Prize field for the text shown in the PromoBar.
You can also use the Advanced Campaign Display to set specific content to display. With this option you can choose a specific giveaway from those that are currently live in your PromoSimple account. You have the option to overwrite the text from the Prize field for that campaign and to, instead, add in whatever text you’d like.
The third option for content of the PromoBar is to assign a URL and write your own text to be displayed within the PromoBar. If this option is enabled, when users click on the PromoBar they will be sent to the URL that you provide. This is useful if you’d like them to enter the promotion on your Facebook page or a page that contains content specific to your promotion. For instance, if the user is tasked with leaving a comment on your blog post that contains your entry form you may want to send the user to that post to enter.
Settings for the PromoBar
You can decide where you’d like the PromoBar to be displayed on webpages, whether at the top or to the side of the page.
Horizontal: This will display the PromoBar across the top of the page.
- Height: Choose either regular (30 pixels tall and uses a 14 pixel font size) or large (50 pixels tall and uses a 17 pixel font size)
- Border: This determines whether a border is shown at the bottom of the PromoBar. The color of this border can be adjusted.
- Stationary: Choose whether the PromoBar should always be visible when users scroll down the webpage or allow it to remain at the top (will be hidden when users begin to scroll down the page)
- Relativity to content: You decide whether the PromoBar should cover the 30-50 pixels at the top of the page or if it should push the content of the page down so that it does not display over your page’s content.
Vertical:
- Alignment: Choose whether the PromoBar should appear on the left or right side of the webpage.
- Width: Use the automatic setting, which adjusts the width to the optimal dimensions depending on your PromoBar content or set a maximum width for the PromoBar to ensure that it does not cover any important content on the page.
Adding the PromoBar to a website
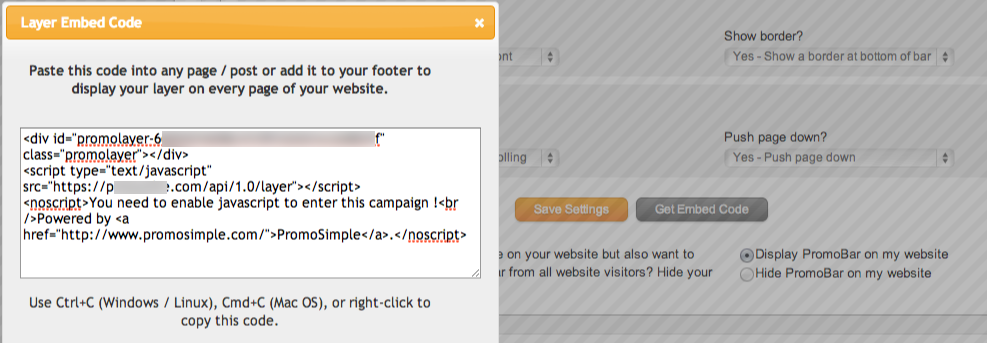
To add the PromoBar to your website simply go to the Promote section within your account and click on the Get Embed Code at the bottom of the page. Copy this code and paste it exactly as it is within your website’s footer section. This will allow the PromoBar to display on every page of your website. You can also add the PromoBar to a specific page or set of pages by adding this code into the page content. The PromoBar will only display on those pages that contain the embed code.

For WordPress users, you can download the PromoSimple Plugin which includes the code for the PromoBar. Once installed, click on the PromoSimple Plugin settings and enter your PromoBar ID.


5 Comments
薇院
Fantastic beat ! I wish to apprentice while you amend your website,
how can i subscribe for a blog web site? The account aided me a acceptable deal.
I have been tiny bit familiar of this your broadcast offered
brilliant transparent idea
인천가라오케
Hey There. I found your blog using msn. That is a very well
written article. I'll be sure to bookmark it and return to read
extra of your helpful info. Thanks for the post.
I'll definitely comeback.
河價
Good day! Would you mind if I share your blog with my facebook
group? There's a lot of folks that I think would really enjoy your content.
Please let me know. Thank you
Escort agency leeds
It's amazing to go to see this web page and reading the views of all mates regarding this piece of
writing, while I am also eager of getting experience.
escorts in leed
What's up friends, how is all, and what you want to say on the topic of
this post, in my view its actually awesome designed for me.